In this post, we will learn how to configure tools required for CloudxLab’s Python for Machine Learning course. We will use Python 3 and Jupyter notebooks for hands-on practicals in the course. Jupyter notebooks provide a really good user interface to write code, equations, and visualizations.
Please choose one of the options listed below for practicals during the course.
Option 1- Use CloudxLab’s lab
At CloudxLab, we provide the virtual online cloud-based lab with all the software and tools pre-installed so that you can start practicing immediately instead of going through the pain of installing and configuring the tools and software on your local machine.
Please find more details on the lab here. You can start with the 1-month plan and extend it as per your convenience.
We recommend to signup for the lab to get most out of the course. If you prefer using your local machine instead, then please follow the steps given in the later section of this guide.
Please note that due to a high number of signups in this course, it will be difficult for us to provide support in case of installation issues on your local machine.
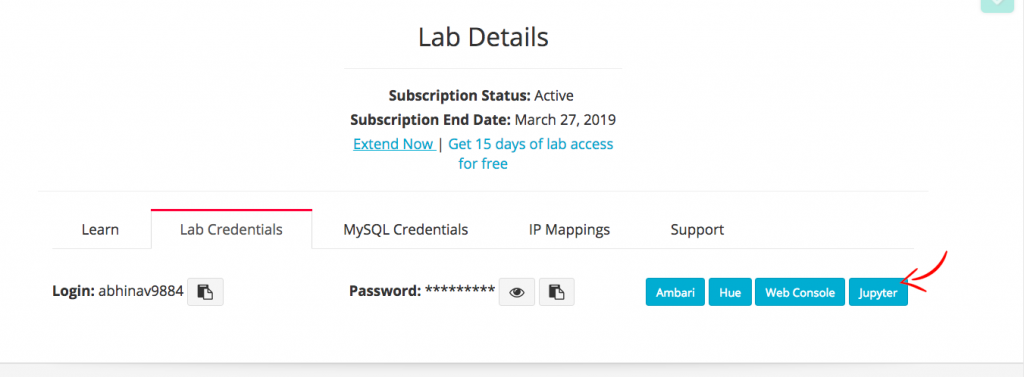
After your subscription to the lab, Navigate to “My Lab” and click on “Lab Credentials”. Here you will see your lab username, password, and links to access various services like Ambari, Hue, Web Console and Jupyter. Click on “Jupyter”.
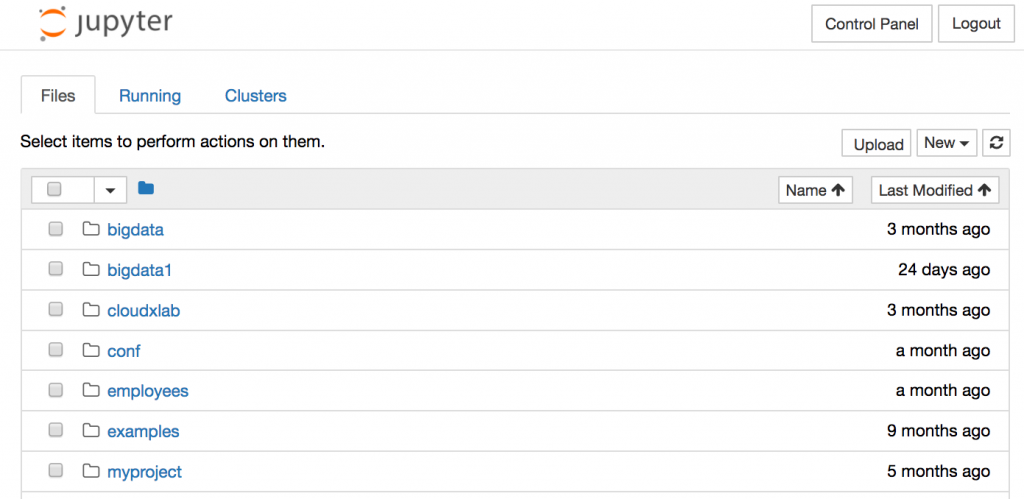
Log in with your lab username and password. After successful login, Jupyter lists all the files and folders in your home directory (if you have any)
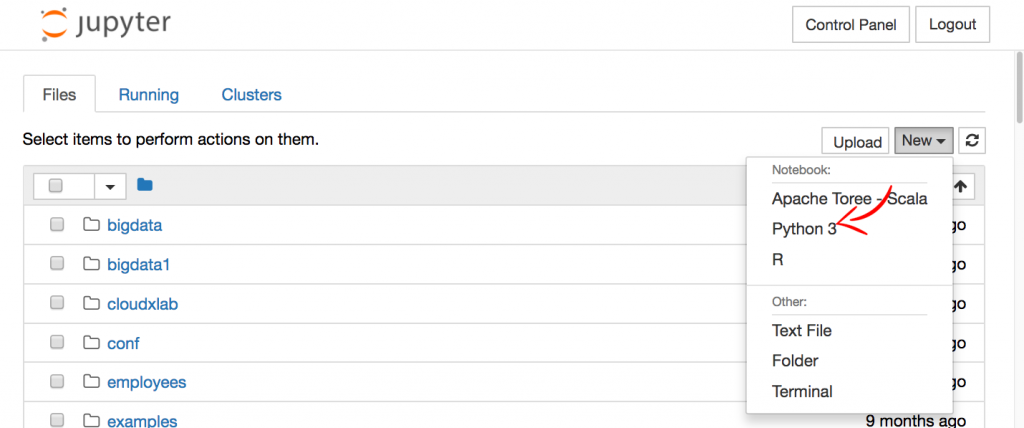
Let’s launch a Python 3 notebook. Click on “New” and select “Python 3” to launch a Python 3 notebook
Jupyter notebook consists of cells where we write the code. Let’s import few python packages and check if Python packages are available. Type below code in the cell and press “Shift + Enter” to execute the code.
import numpy
import pandas
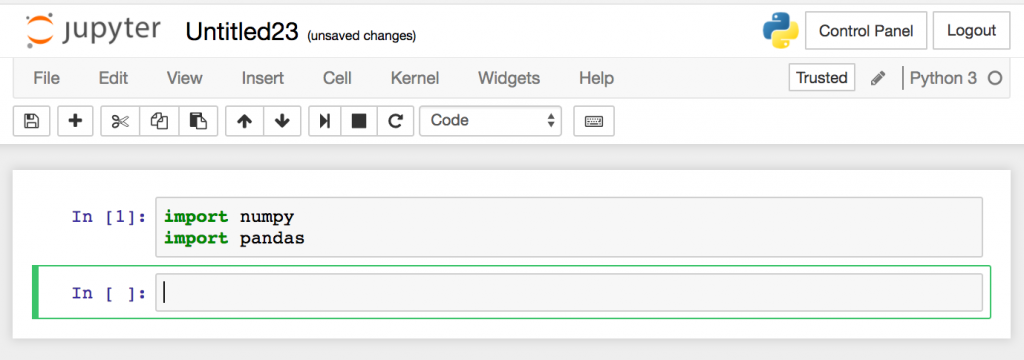
As you can see that we have successfully imported the packages as there is no error displayed by the notebook. Now we’re good to go for doing hands-on in the lab during the course.
Option 2 – Install Python 3 on your local machine
If you prefer installing these tools locally then please follow below steps
2.1 Installation on Windows
We’ll use Anacoda to configure packages required for the course. Anaconda is a Python distribution that makes it easy to install Python and other data science and machine learning libraries in a flexible way on a Windows, Mac and Linux machines.
Let’s download Anaconda. Go to Anaconda download page and download Python 3.6, 64-bit Graphical installer. Please, select 32-bit installer if your Windows is 32-bit.
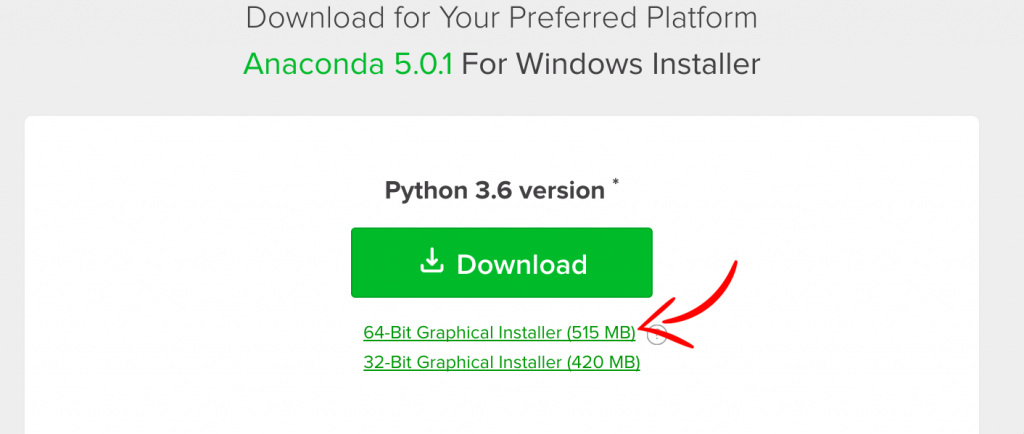
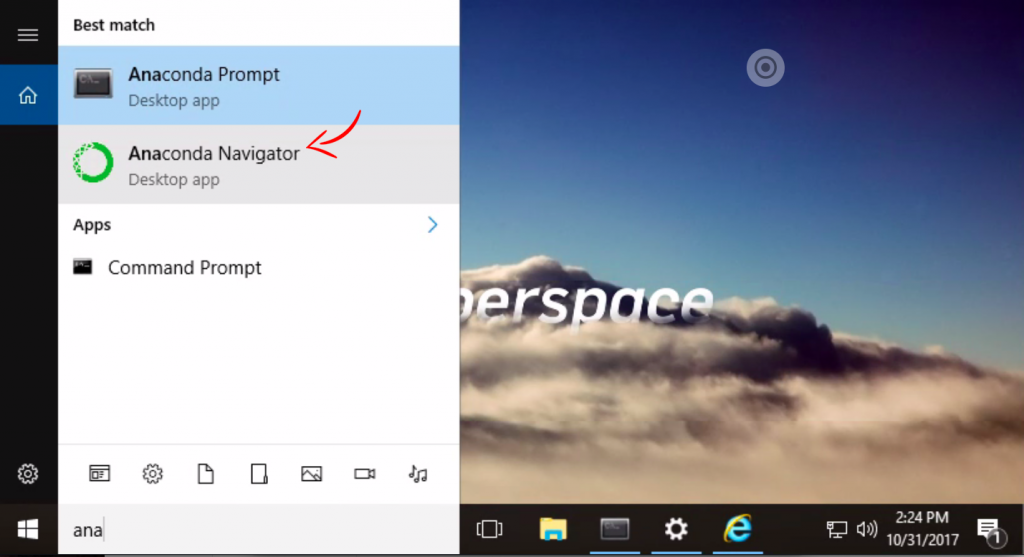
Now install the Anaconda’s .exe file. After the installation is complete, search for “Anaconda Navigator” in the programs and click on it.
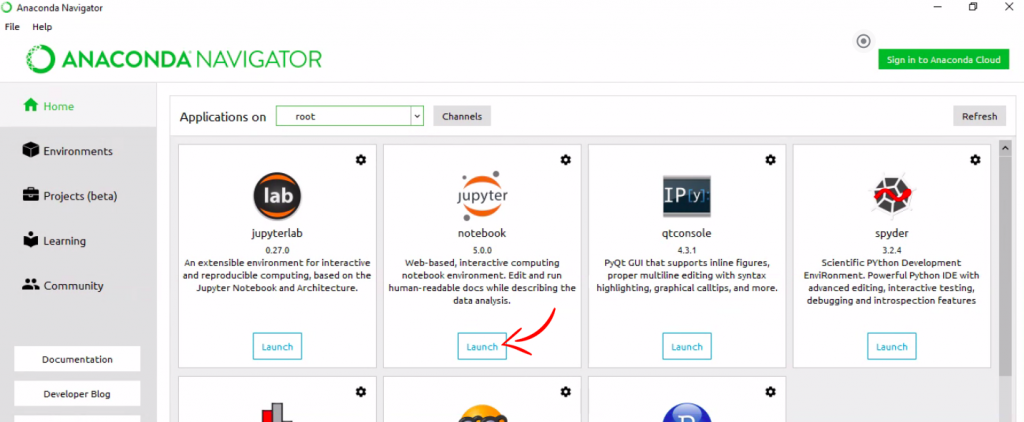
Now click on “Launch” in the Jupyter box and the notebook will open in the browser window

We can also open a notebook from the command line. Search for “Anaconda Prompt” in the programs and click on it.
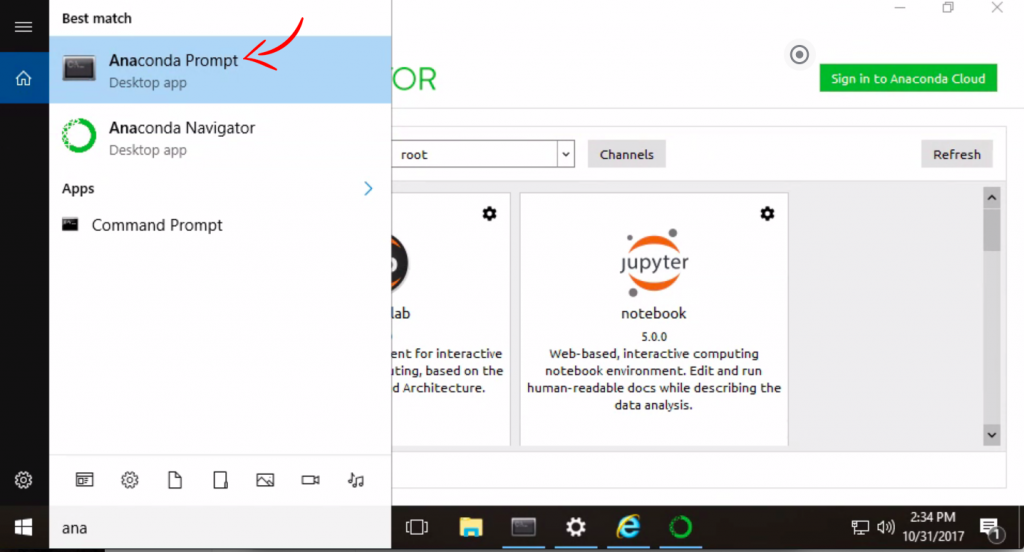
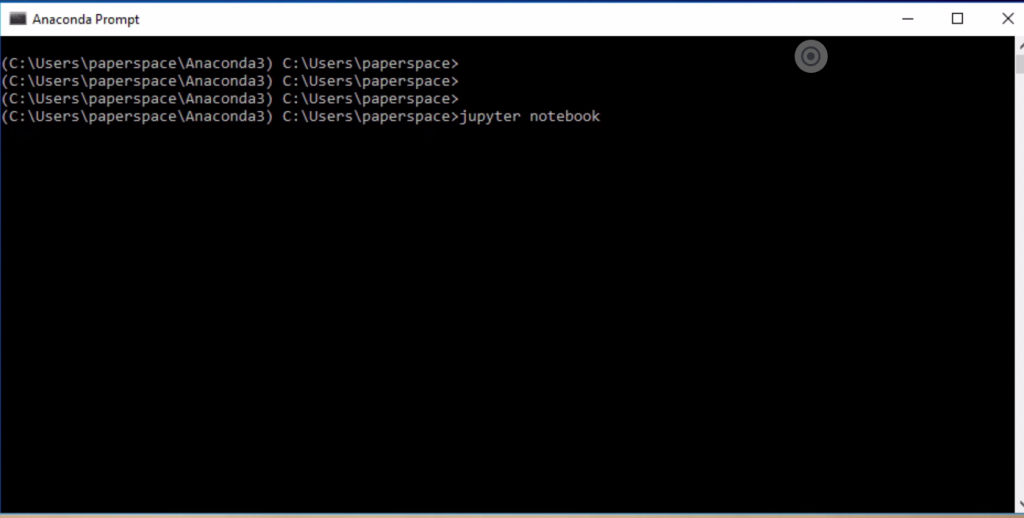
Anaconda prompt opens. Type “jupyter notebook” on the prompt and press enter to launch the notebook.
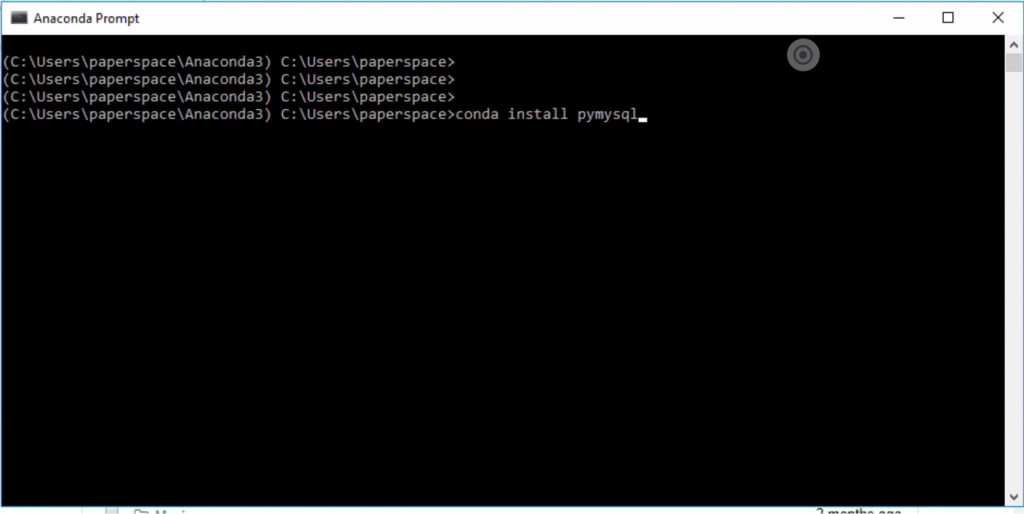
We can also install the libraries from the command line. For example, to install the library ‘pymysql’ type below command, press enter, and the package will be installed
conda install pymysql
2.2 Installation on Mac OS
Download Python 3.6, 64-bit graphical installer from here and install it. Choose “install for this user only” during the setup process. After the installation open “anaconda-Navigator” and click on “Launch” under Jupyter to launch notebook.
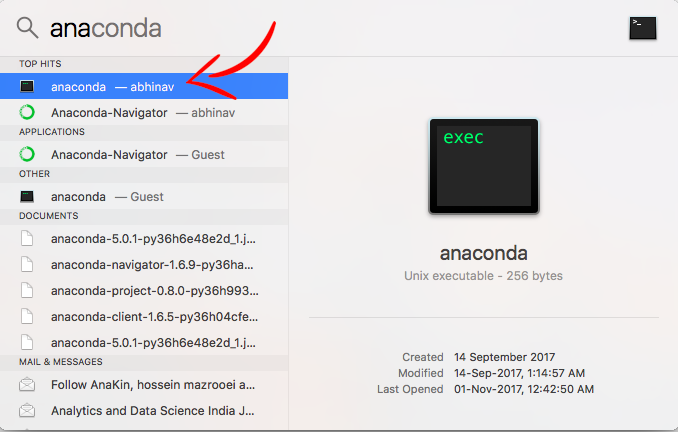
To access anaconda using command line, search for anaconda and click on “anaconda” which is UNIX executable
2.3 Installation on Linux
Download the Python 3.6, 64 bit command line installer from here
Now give the execute permission to .sh file and run it. Type below commands
chmod +x Anaconda2-5.0.1-Linux-x86_64.sh
./Anaconda2-5.0.1-Linux-x86_64.sh
Anaconda will be installed in ~/anaconda3 directory. Go to anaconda3 directory and launch the notebook. Type below commands
cd ~/anaconda3
jupyter notebook
Download MNIST dataset
# You have to run this code just once in Jupyter notebook in Python 3 kernel
from sklearn.datasets import fetch_mldata
mnist = fetch_mldata('MNIST original')
Hope this guide helps you in setting up your environment for the hands-on practical during the course.
See you in the course and happy learning!