In this blog post, we will learn how to install Python packages on CloudxLab.
Step 1-
Create the virtual environment for your project. A virtual environment is a tool to keep the dependencies required by different projects in separate places, by creating virtual Python environments for them. Login to CloudxLab web console and create a virtual environment for your project.
First of all, let’s switch to python3 using:-
export PATH=/usr/local/anaconda/bin:$PATH
Now let’s create a directory and the virtual environment inside it.
$ mkdir my_project
$ cd my_project
$ python -m venv venv
Step 2-
To begin using the virtual environment, it needs to be activated:
$ . venv/bin/activate
Remember the dot “.” at the starting of the above command. The name of the current virtual environment will now appear on the left of the prompt (e.g. (venv)[your_username@cxln4 ~]$:my_project$) to let you know that it’s active. From now on, any package that you install using pip will be placed in the venv folder.
Step 3-
Install packages as usual
$ pip install requests
$ pip install flask
Step 4-
If you are done working in the virtual environment you can deactivate it:
$ deactivate
Next time when you want to use the same virtual environment, go to your project directory and activate the virtual environment
$ cd my_project
$ . venv/bin/activate
Launching Jupyter Notebook inside your virtual environment
You can also launch jupyter notebook inside your virtual environment. For that, you need to follow the below steps:-
Step 1-
First of all, activate your virtual environment.
cd my_project
. venv/bin/activate
Step 2-
Install jupyter notebook using the following command
pip install jupyter
Step 3-
Add your virtual environment to the jupyter.
python -m ipykernel install --user --name=venv
Step 4-
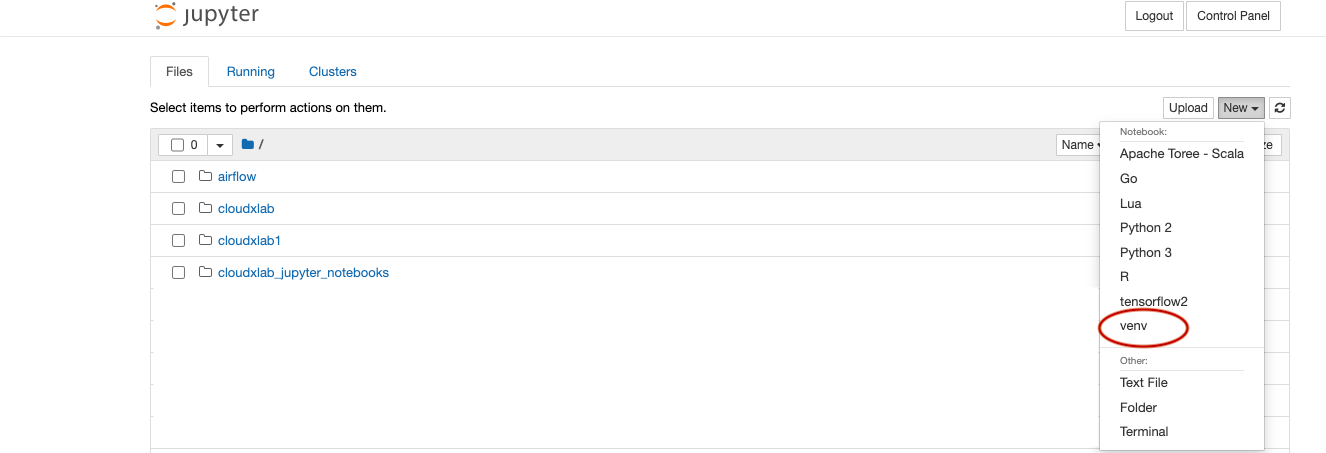
Now go to Jupyter Homepage at https://jupyter.e.cloudxlab.com/. Click on “New”. There you will be able to see a kernel with the name of your virtual environment (venv). Launch notebook with that kernel.
Now you can use jupyter notebook in your virtual environment.