In this blog post, we will learn how to install Python packages on CloudxLab.
Step 1-
Create the virtual environment for your project. A virtual environment is a tool to keep the dependencies required by different projects in separate places, by creating virtual Python environments for them. Login to CloudxLab web console and create a virtual environment for your project.
First of all, let’s switch to python3 using:-
export PATH=/usr/local/anaconda/bin:$PATH
Now let’s create a directory and the virtual environment inside it.
$ mkdir my_project
$ cd my_project
$ python -m venv venv
Step 2-
To begin using the virtual environment, it needs to be activated:
$ . venv/bin/activate
Remember the dot “.” at the starting of the above command. The name of the current virtual environment will now appear on the left of the prompt (e.g. (venv)[your_username@cxln4 ~]$:my_project$) to let you know that it’s active. From now on, any package that you install using pip will be placed in the venv folder.
Step 3-
Install packages as usual
$ pip install requests
$ pip install flask
Step 4-
If you are done working in the virtual environment you can deactivate it:
$ deactivate
Next time when you want to use the same virtual environment, go to your project directory and activate the virtual environment
$ cd my_project
$ . venv/bin/activate
Launching Jupyter Notebook inside your virtual environment
You can also launch jupyter notebook inside your virtual environment. For that, you need to follow the below steps:-
Step 1-
First of all, activate your virtual environment.
cd my_project
. venv/bin/activate
Step 2-
Install jupyter notebook using the following command
pip install jupyter
Step 3-
Add your virtual environment to the jupyter.
python -m ipykernel install --user --name=venv
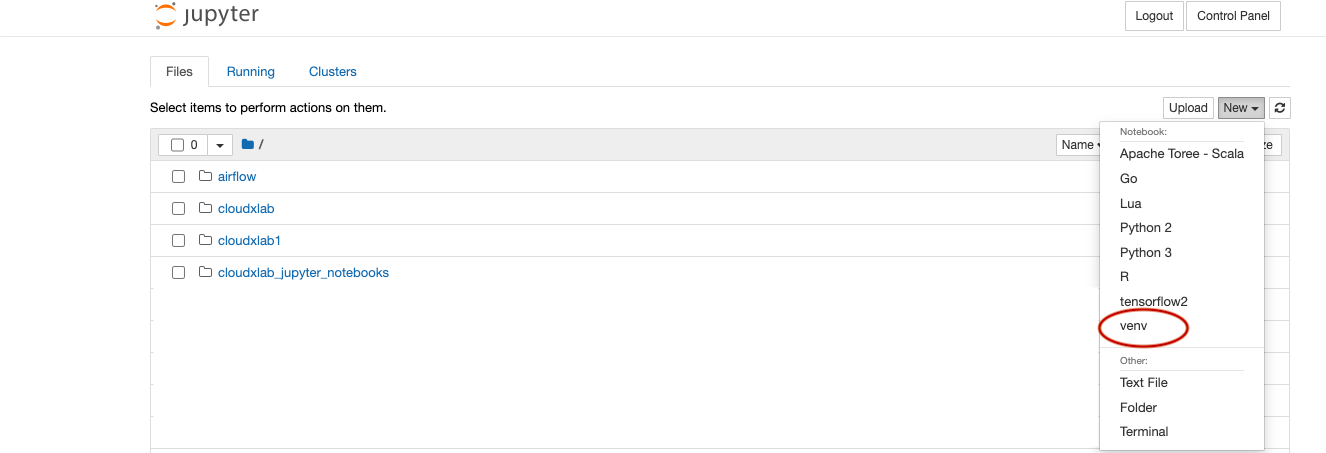
Step 4-
Now go to Jupyter Homepage at https://jupyter.e.cloudxlab.com/. Click on “New”. There you will be able to see a kernel with the name of your virtual environment (venv). Launch notebook with that kernel.
Now you can use jupyter notebook in your virtual environment.
This tutorial is very helpful!
Good to know that you liked it
Hi Abhinav,
Could I run pmc3 within Jupyter Notebook at CloudxLab after my installation of ‘pip install git+https://github.com/pymc-devs/pymc3’? thanks.
Regards,
Bintao Li
Hi @bintaoli:disqus,
I’ve installed pymc3 on CloudxLab.
Can you please check it once.
Thanks
Regards,
Abhinav
Hi Abhinav,
it works now. Thanks.
Regards,
Bintao Li