When you are building a production system whether it’s a machine learning model deployment or simple data cleaning, you would need to run multiple steps with multiple different tools and you would want to trigger some processes periodically. This is not possible to do it manually more than once. Therefore, you need a workflow manager and a scheduler. In workflow manager, you would define which processes to run and their interdependencies and in scheduler, you would want to execute them at a certain schedule.
When I started using Apache Hadoop in 2012, we used to get the HDFS data cleaned using our multiple streaming jobs written in Python, and then there were shell scripts and so on. It was cumbersome to run these manually. So, we started using Azkaban for the same, and later on Oozie came. Honestly, Oozie was less than impressive but it stayed due to the lack of alternatives.
As of today, Apache Airflow seems to be the best solution for creating your workflow. Unlike Oozie, Airflow is not really specific to Hadoop. It is an independent tool – more like a combination of Apache Ant and Unix Cron jobs. It has many more integrations. Check out Apache Airflow’s website.
We have not made Apache Airflow available on CloudxLab. Here are the steps to get started:
1. Python3 Path
export PATH=/usr/local/anaconda/bin:$PATH
2. Set Airflow home
export AIRFLOW_HOME=~/airflow
3. Initialize DB
airflow db init
4. Create admin user name.
Once you run this command it will ask for a password. Please feel free to set the correct parameters.
airflow users create \
    --username admin \
    --firstname Peter \
    --lastname Parker \
    --role Admin \
    --email myself@gmail.com
5. Start the web server
This starts the user interface of Airflow. Please note that the only ports that are public on CloudxLab range from 4040 to 4100. In case, the following command gives an error, please try choosing some other port.
airflow webserver --port 4050
For example, if you are getting an error [ERROR] Connection in use: ('0.0.0.0', 4050), press CTRL+c to cancel and try increasing the port number airflow webserver --port 4060
6. Find out the host on which you are located.
First find out the private ip address of the host using ifconfig
And then, using the IP Mapping in MyLab find out the public hostname.
7. Open the Airflow UI using the port (step 5) and host (step 6). The URL would look something like this: http://e.cloudxlab.com:4050
You will see a UI like this:
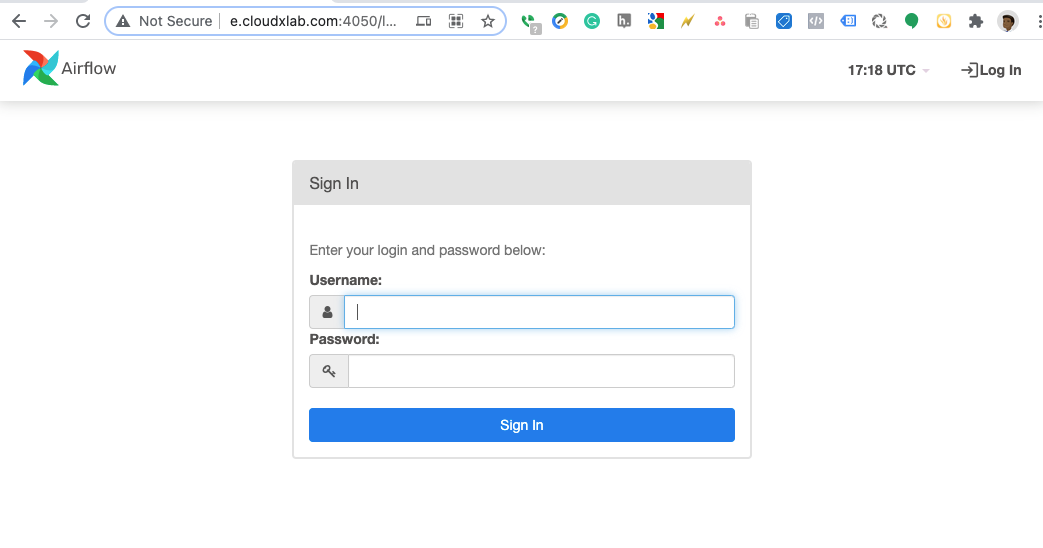
Enter the login as ‘admin’ and password as specified in step 4.
Once you have logged in, you will see an interface like the following.
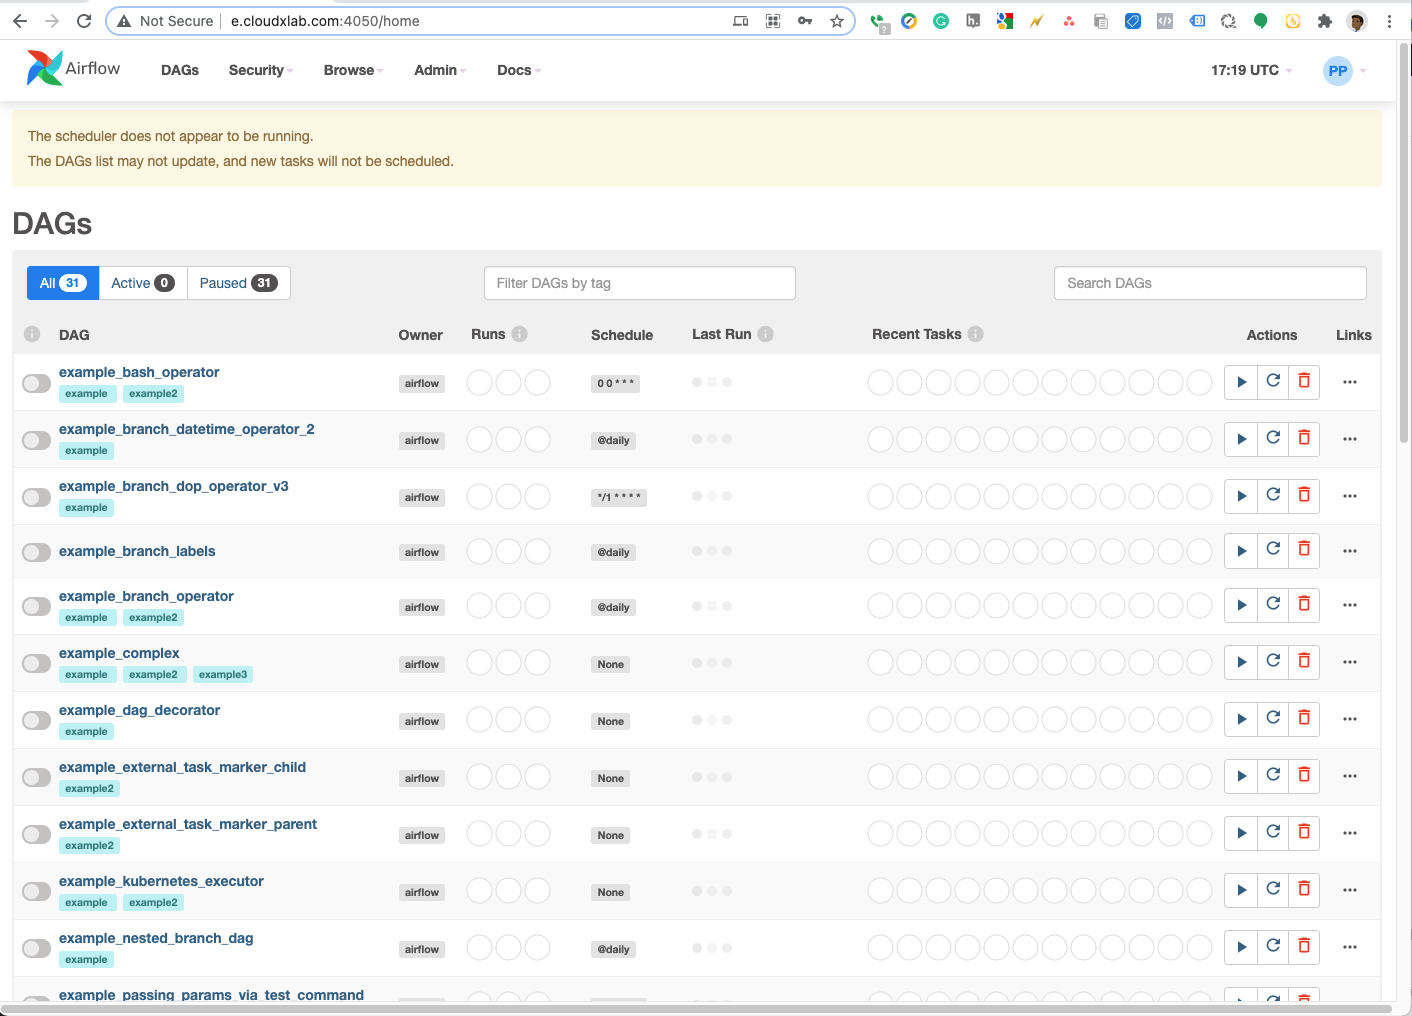
Now you can go ahead and start the start using the Apache Airflow.
# start the scheduler
# open a new terminal or else run webserver with ``-D`` option to run it as a daemon
airflow scheduler
You can follow these tutorials and How-To guides.