
In this blog we will show how to label custom images for making your own YOLO detector. We have other blogs that cover how to setup Yolo with Darknet, running object detection on images, videos and live CCTV streams. If you want to detect items not covered by the general model, you need custom training.
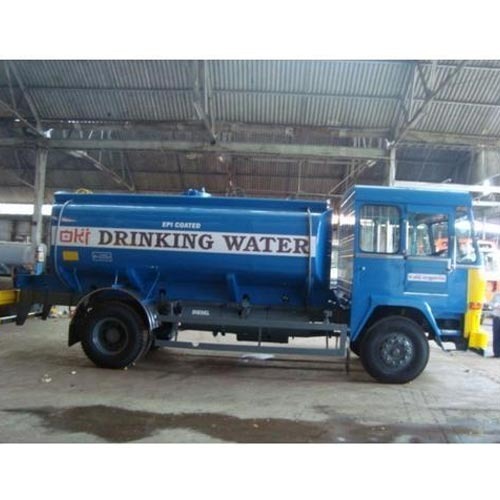
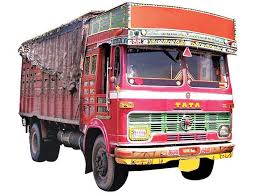
In our case we will build a truck type detector. There are 4 types of trucks we will try to identify


Directory Structure for custom YOLO training
We will follow the directory structure seen in the bloc below.
└── workspace
    ├── darknet
    │   ├── backup
    │   ├── cfg
    │   ├── data
    │   │   └── labels
    │   ├── examples
    │   ├── include
    │   ├── obj
    │   ├── python
    │   ├── results
    │   ├── scripts
    │   └── src
    ├── images
    │   ├── test
    │   └── train
    └── labels
        ├── test
        └── train
We will now explain the directory structure and explain what is saved where.
- workspace – parent directory that contains all the other directories
- darknet – We will install darknet in this folder. The commands for installation of darknet can be found in this blog.
- images – This contains all the images, sub-divided in the train and test sets. The train images contain the set of images YOLO will be trained on. We will run evaluation on the images in the test set. We will save all our images in these directories
- labels – We will keep all labels both test and train in this directory
How to label custom images for Yolo with LabelImg
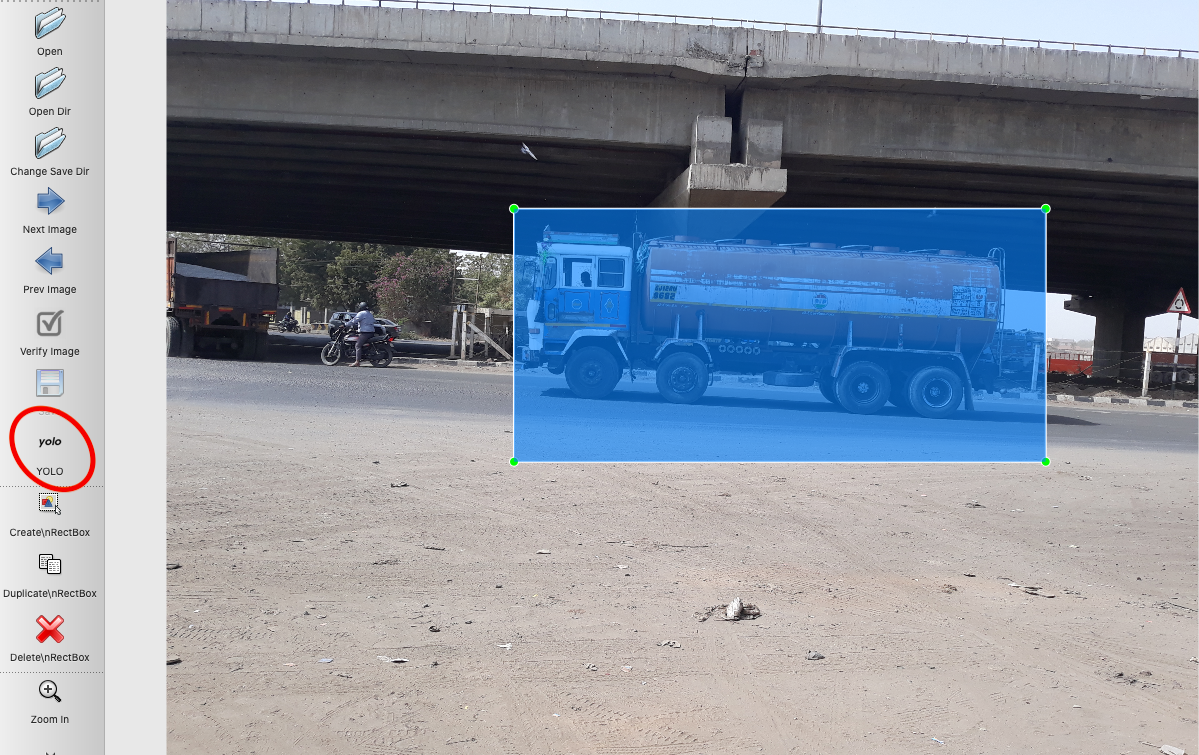
We will use LabelImg to label images. LabelImg is available on mac, windows and unix. LabelImg is written in Python and QT5. I will again recommend that you use virtualenv to create a separate Python working environment for LabelImg.
I installed LabelImg on my Mac with the commands listed on the github page. We will first create a classes.names file. In this file we will list all the labels we will use in labelling.
tanker
dumper
flatbed
semiflat
We have 4 labels for our dataset. Make sure you do this correctly. In case you edit this file later, you may have to re-do the annotation. We will keep this file in the darknet/data directory. The command to launch the labelImg is
python3 labelImg.py [IMAGE_PATH] [PRE-DEFINED CLASS FILE]- Build and launch using the instructions above.
- Click ‘Change default saved annotation folder’ in Menu/File to the appropriate location in the labels directory. The labels for the test set should be labels/test and train should be in labels/train. The Yolo training tool will look for the label files in this directory. Alternately, you can also copy the label txt files
- Change the save format to YOLO from the Pascal VOC
- To open files click ‘Open Dir’
- Click ‘Create RectBox’ and release left mouse to select a region to annotate the rect box
- You can use right mouse to drag the rect box to copy or move it
The process of labelling can be painstaking and long. Use some of LabelImg’s shortcuts to reduce the tedium.
Interpreting the label file
Open the label file to understand what labelling is. A sample file can look like this
2 0.498408 0.509804 0.990446 0.980392The format of the label file is
Label_ID_1 X_CENTER_NORM Y_CENTER_NORM WIDTH_NORM HEIGHT_NORM
Label_ID_2 X_CENTER_NORM Y_CENTER_NORM WIDTH_NORM HEIGHT_NORM
The label_id is the index number in the classes.names file. The id of the first label will be 0 and an increasing integer after that. Note all the position attributes in the label file are not absolute but normalised.
X_CENTER_NORM = X_CENTER_ABS/IMAGE_WIDTH
Y_CENTER_NORM = Y_CENTER_ABS/IMAGE_HEIGHT
WIDTH_NORM = WIDTH_OF_LABEL_ABS/IMAGE_WIDTH
HEIGHT_NORM = HEIGHT_OF_LABEL_ABS/IMAGE_HEIGHT
The labelling of the images is now done and we can start training the YOLO now. The training will be covered in another blog as part of this series.
- YOLO with Darknet
- Running YOLO with python
- YOLO on the CCTV feed
- Custom training with YOLO